I love granola! I start to crave it this time of year, I often add it on top of a big smoothie bowl! Perfect when the sun starts shining and the temps warm up! I am a BIG fan of nut butter and always up for something sweet – Chocolate Peanut Butter Granola?! YUM!! But I was craving something light! That is where this recipe was born. Simple ingredients, one bowl and could be allergy (nut free) friendly if you omitted the pecans!
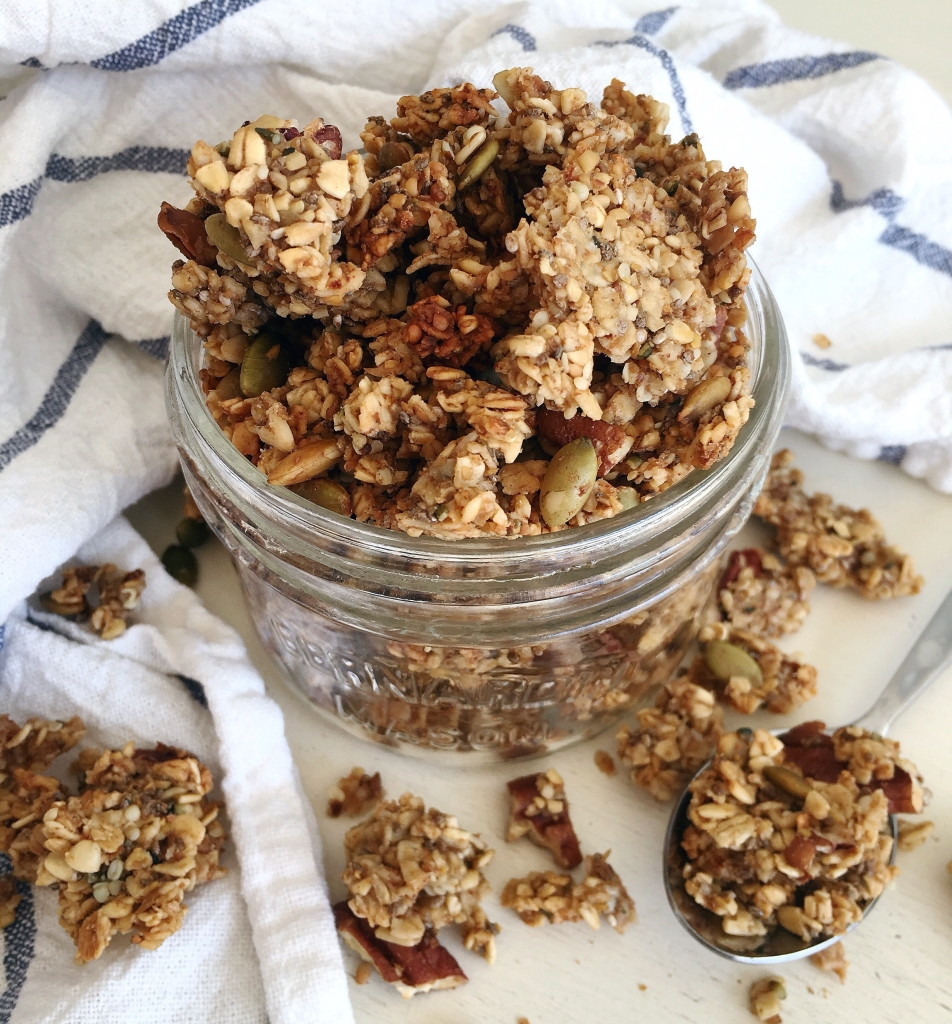
Cinnamon Granola
wet ingredients:
1/2 cup apple sauce
1/4 cup honey
2 tbs coconut oil (melted, room temp)
dry ingredients:
3 cups oats ( I used 1 cup steel cut, 2 cups quick)
1/4 cup ground flax seed
3 tbs chia seeds
3 tbs hemp hearts
1 tsp cinnamon
1/2 tsp nutmeg
1/2 cup nuts and/or seeds of your choice (I used pumpkin seeds & pecans)
pink of sea salt
Mix dry ingredients in a bowl.
Add all of the dry ingredients and mix.
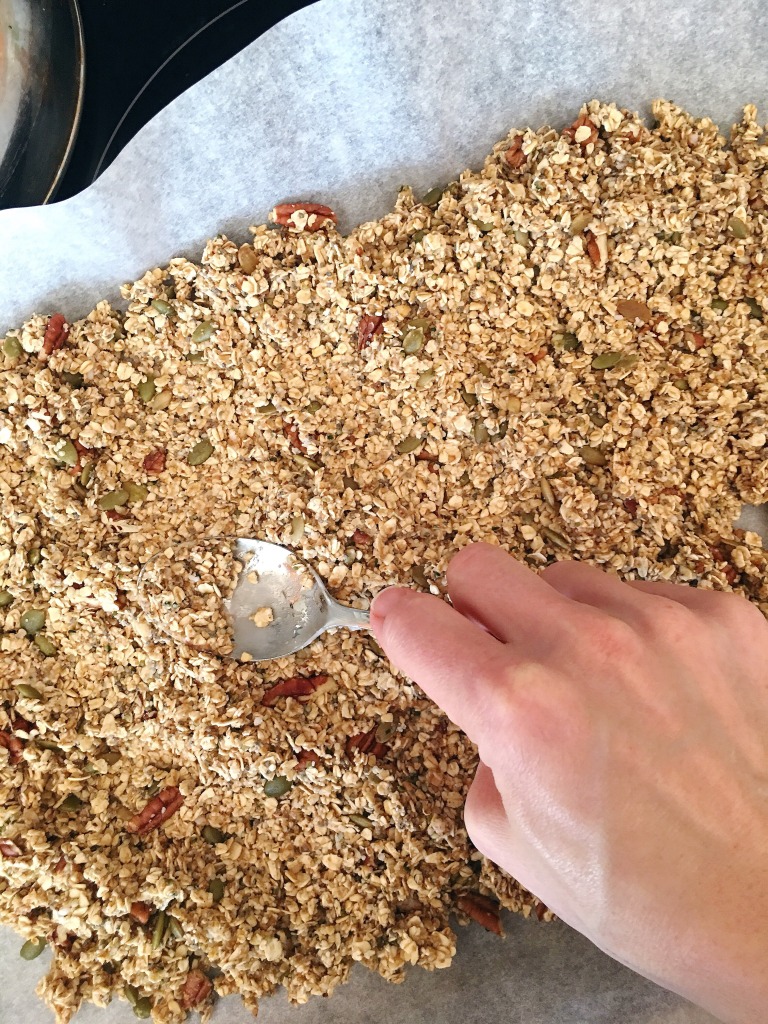
Pour all of the mixture on a pan lined with parchment paper and press flat with the back of the spoon.
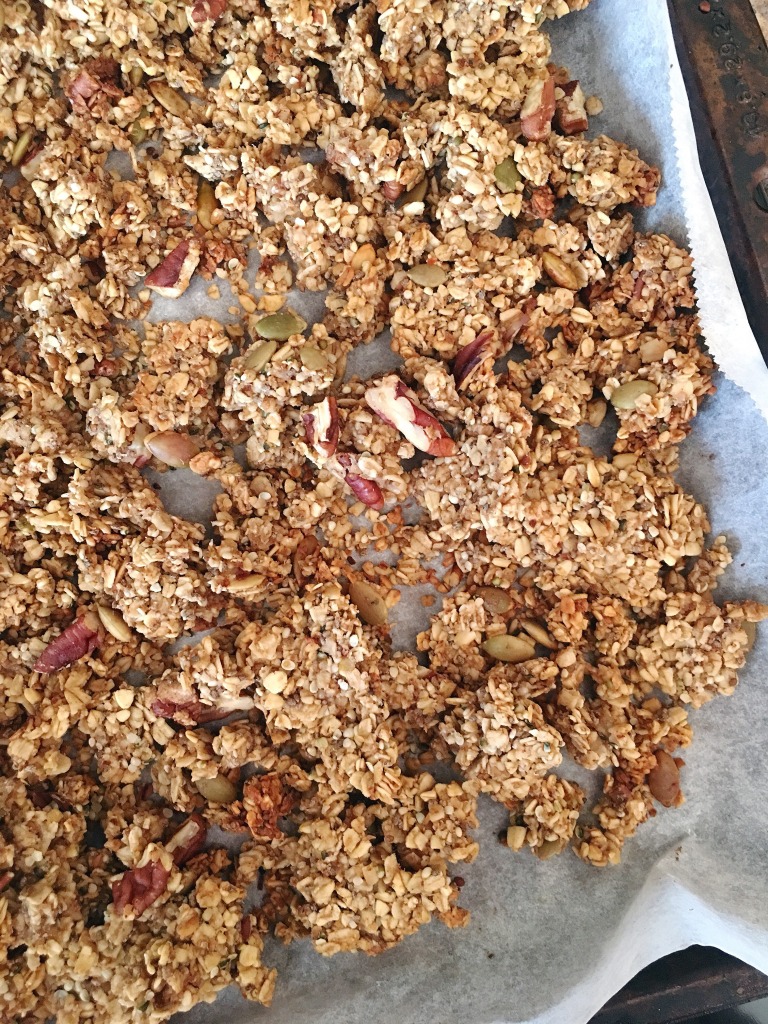
Bake at 300 for 40 min. Pulling the pan out to flip and gently mix the granola every 10 min.
Remove from oven, allow to cool completely before touching it!
Store in an airtight container. I like to store mine in the fridge – Keeps its extra crunchy (because of the coconut oil!)
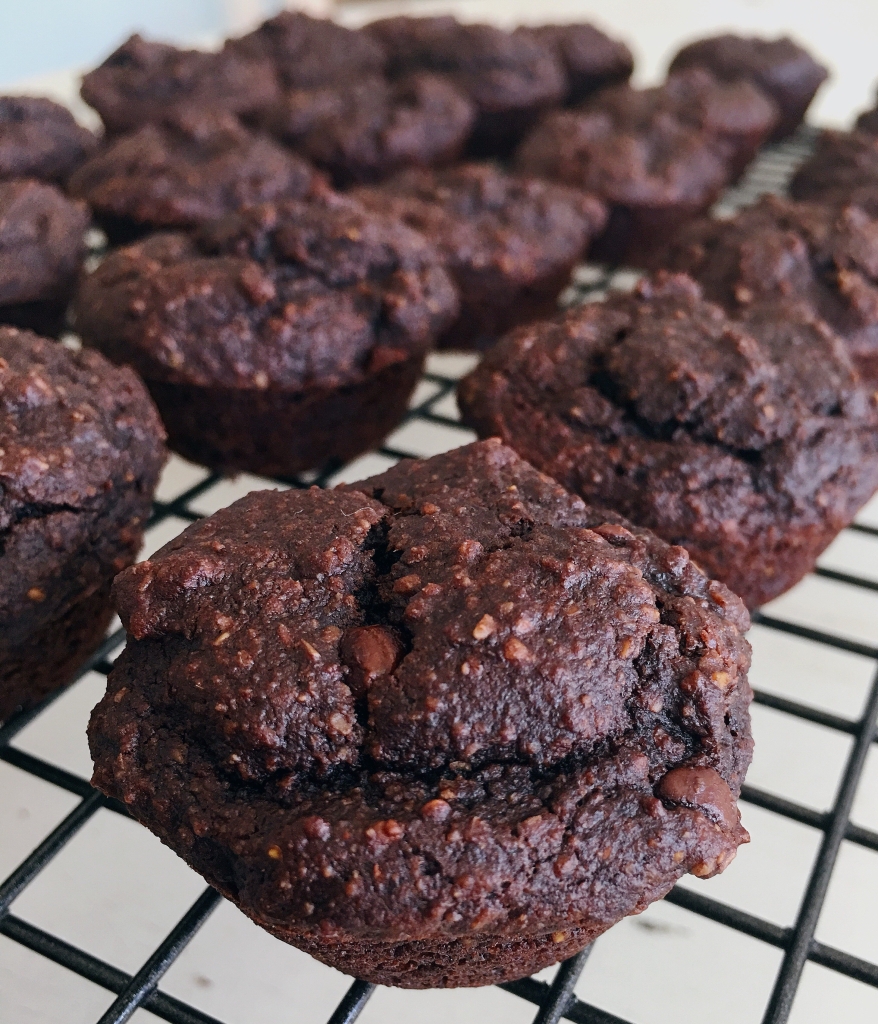
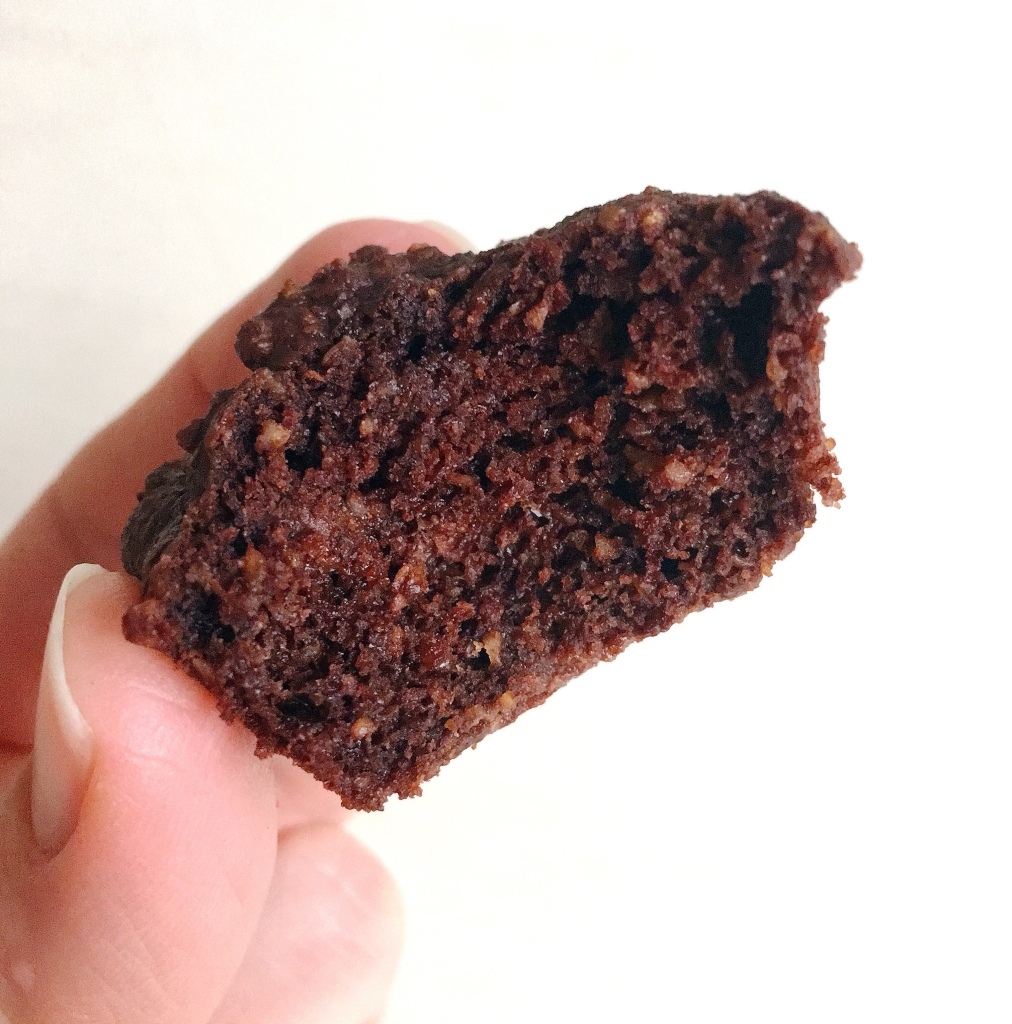
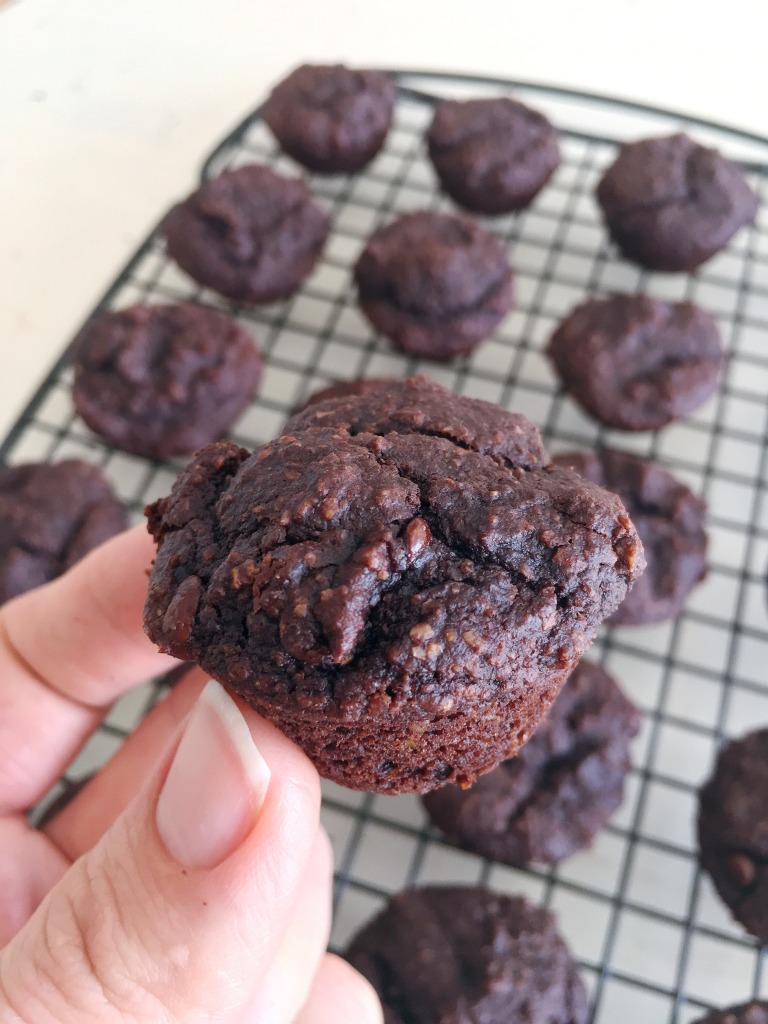
If I call these mini muffins instead of brownies, can I have them for breakfast?!
Cute little bite size treats, baked in a mini muffin pan! Made with Oat and Almond flour, dairy free with an egg free option. If nuts are an issue, you can use all Oat Flour, measurement details below!
Two Bite Brownies
Dry Ingredients:
3/4 cup Oat Flour*
3/4 cup Almond Flour*
1/3 Cup Cocoa
1/3 cup Coconut Sugar
1/2 tsp baking soda
1 tsp baking powder
1 tsp cinnamon
Optional: 1/4 cup chocolate chips
sea salt
Wet Ingredients:
1/4 cup Apple Sauce
3 tbs Avocado Oil
3 tbs Almond Milk
1 egg or flax egg
1 tbs of Apple Cider Vinegar (if using a flax egg)
Mix all the dry ingredients in a medium size bowl.
Add all the wet ingredients to the dry and mix.
Fill a prepared mini muffins pan.
Bake at 350 for 12-15 min. I like mine slightly under baked!
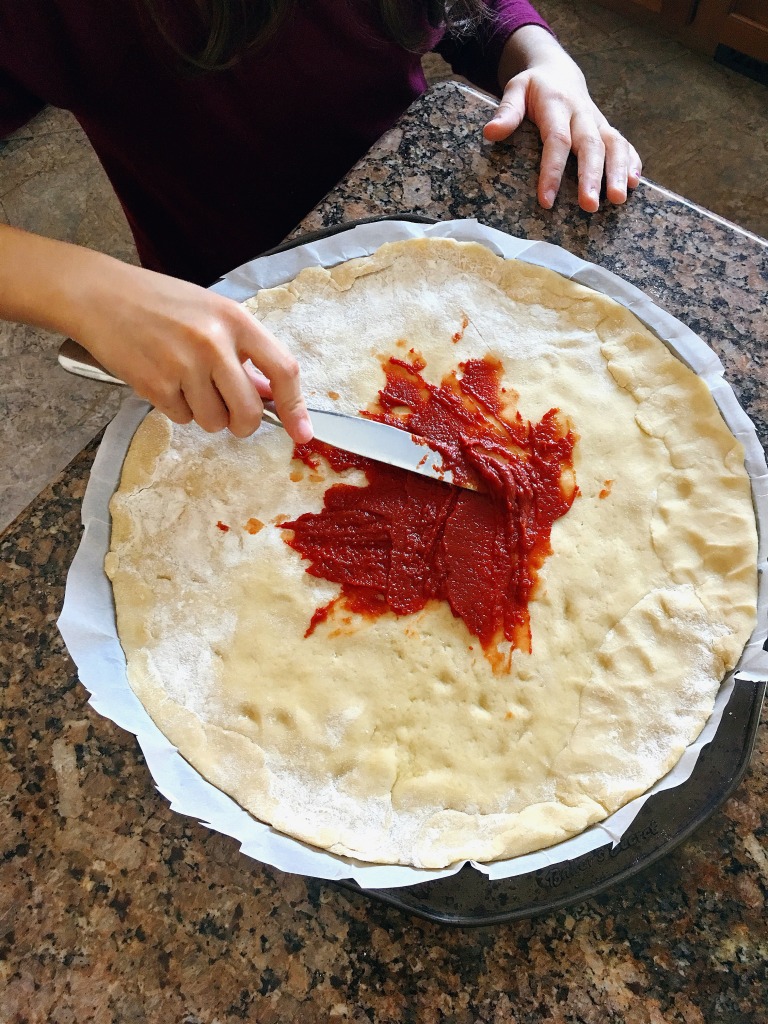
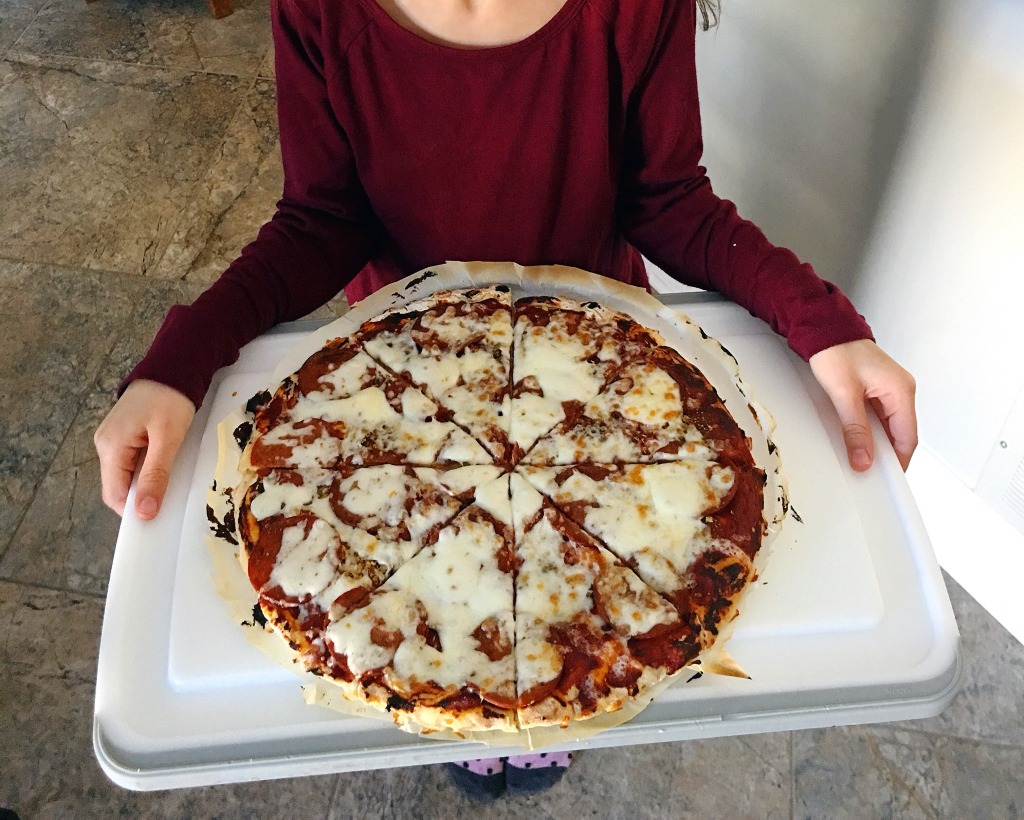
Saturday Pizza & Movie Night is a very loved family tradition and one we rarely miss! Sometimes we take the quick options, but we often make out own!
This simple dough recipe is the same one I grew up on – I just swap white flour for Spelt flour. I remember helping my mom make pizza for Hockey Night in Canada, growing up. So much fun passing on this tradition to our littles! Watching them get in there and enjoy the process as much as my sisters and I did!!
Pizza Dough
makes: 2 medium size crusts
2 tsp active dry yeast
1 cup warm water
mix with wooden spoon and set aside for 5-10 minutes.
In a large bowl mix:
3 cups Spelt Flour
dash of sea salt
2 tbs olive oil
add water/yeast mixture to the flour, salt and oil
mix & knead with hands – continue for 5-10 min – more kneading the better!
in the bowl, form the dough into a ball. Pour approximately 1 tbs olive oil on top, use fingers to spread over entire surface of the dough.
Cover with a tea towel & leave to rise on your counter for 1-2 hrs.
Remove the dough from the bowl. Knead & roll on a floured surface. Place on a pan layered with parchment paper.
Spread tomato paste all over the pizza. Sprinkle with Italian seasoning & (optional) Nutritional yeast.
Bake at 400 for 10-15 min. Remove & top with all your favourite toppings. Place back in oven on broil setting until golden. Enjoy!!
We LOVE muffins. Most weeks there is a fresh batch being made, often one waiting for us in the freezer! They make a perfect grab and go breakfast or snack! Or a perfect addition to a picnic in the Summer!
These muffins are a favourite in our house. Sweet enough my kids think they are a treat! But full of protein, fiber and ingredients I can feel good about. They are great on their own, but chocolate chips are always a nice addition!!
Banana Quinoa Muffins
makes approximately 1 dozen
Dry ingredients:
1 cup quinoa flakes
1 cup of quinoa flour
1/2 cup ground flax seed
1/4 cup hemp hearts
3 tbs chia seeds
1 tsp baking soda
1 tsp baking powder
1 tsp cinnamon
sea sat
wet ingredients:
2 mashed bananas
1/2 cup apple sauce
1/2 cup dairy free milk
1/4 cup maple syrup
1 tbs apple cider vinegar
1/3 cup Enjoy Life Dark Chocolate Chips (optional)
mix wet & dry in separate bowls
add wet to dry & fold until dry completely disappears, don’t over stir
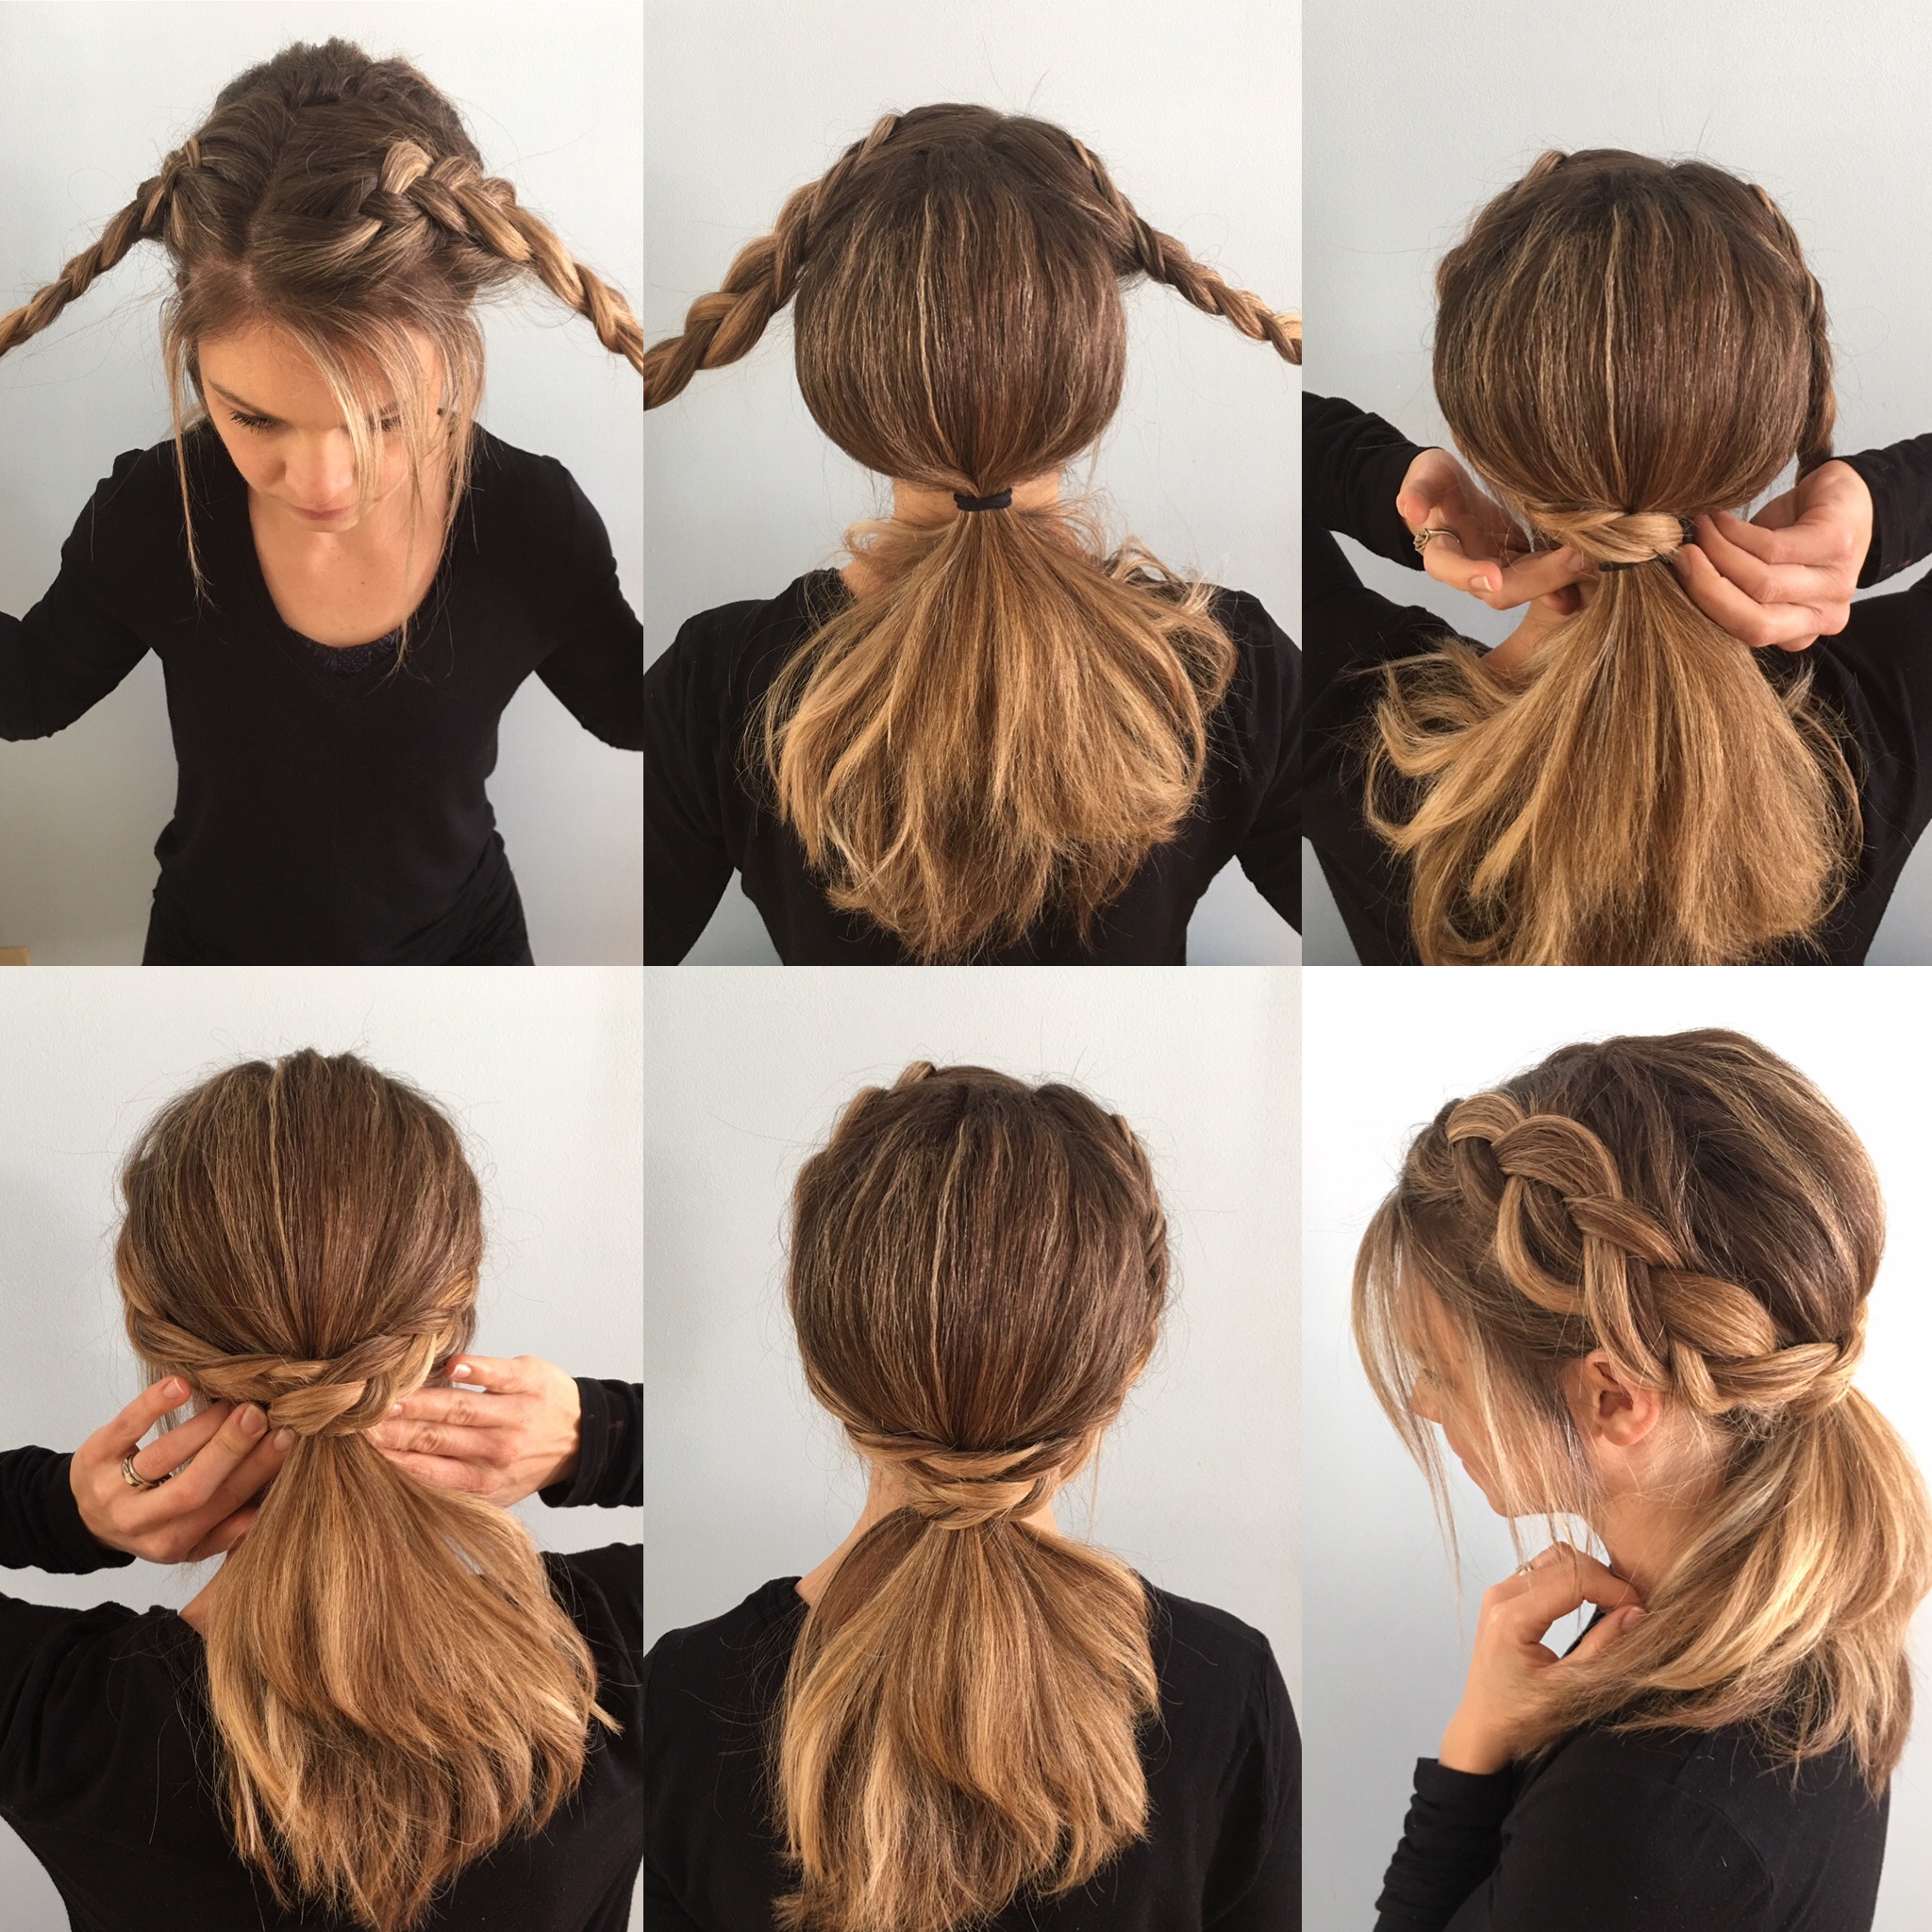
Quick step by step for a braided ponytail. Perfect for a busy morning or for a day you don’t have time to wash your hair. My original Dutch Braid video tutorial in saved in my Story Highlights on my Instagram! https://www.instagram.com/helpyourself.kp/
I have been playing around with Date Sugar in a few recipes & I have to say, I’m a fan! As far as sugars go, this is a great option. It is ground, dried dates – the the processing is quite low! There are 12g of Sugar per 1/4 cup which is also quite amazing! It does not melt or dissolve the same as even coconut sugar does, so that does need to be taken into account. As far as taste goes, it gets a 10/10 from me!
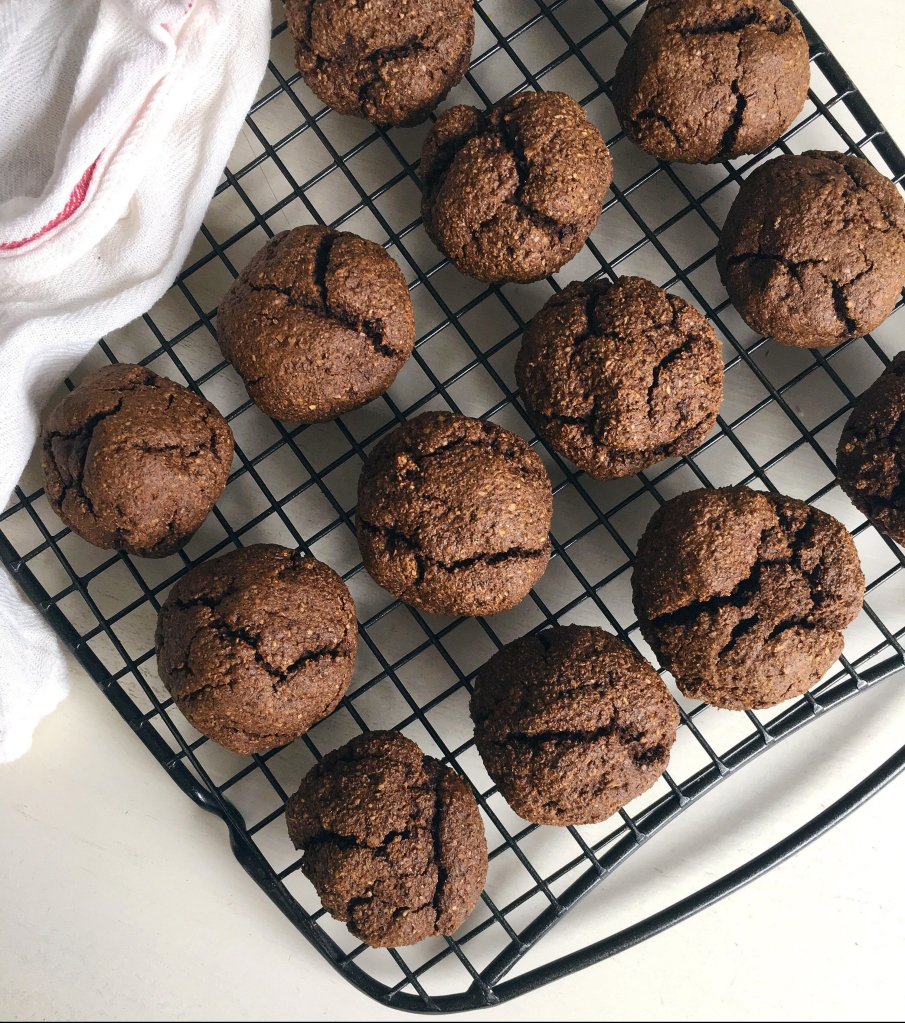
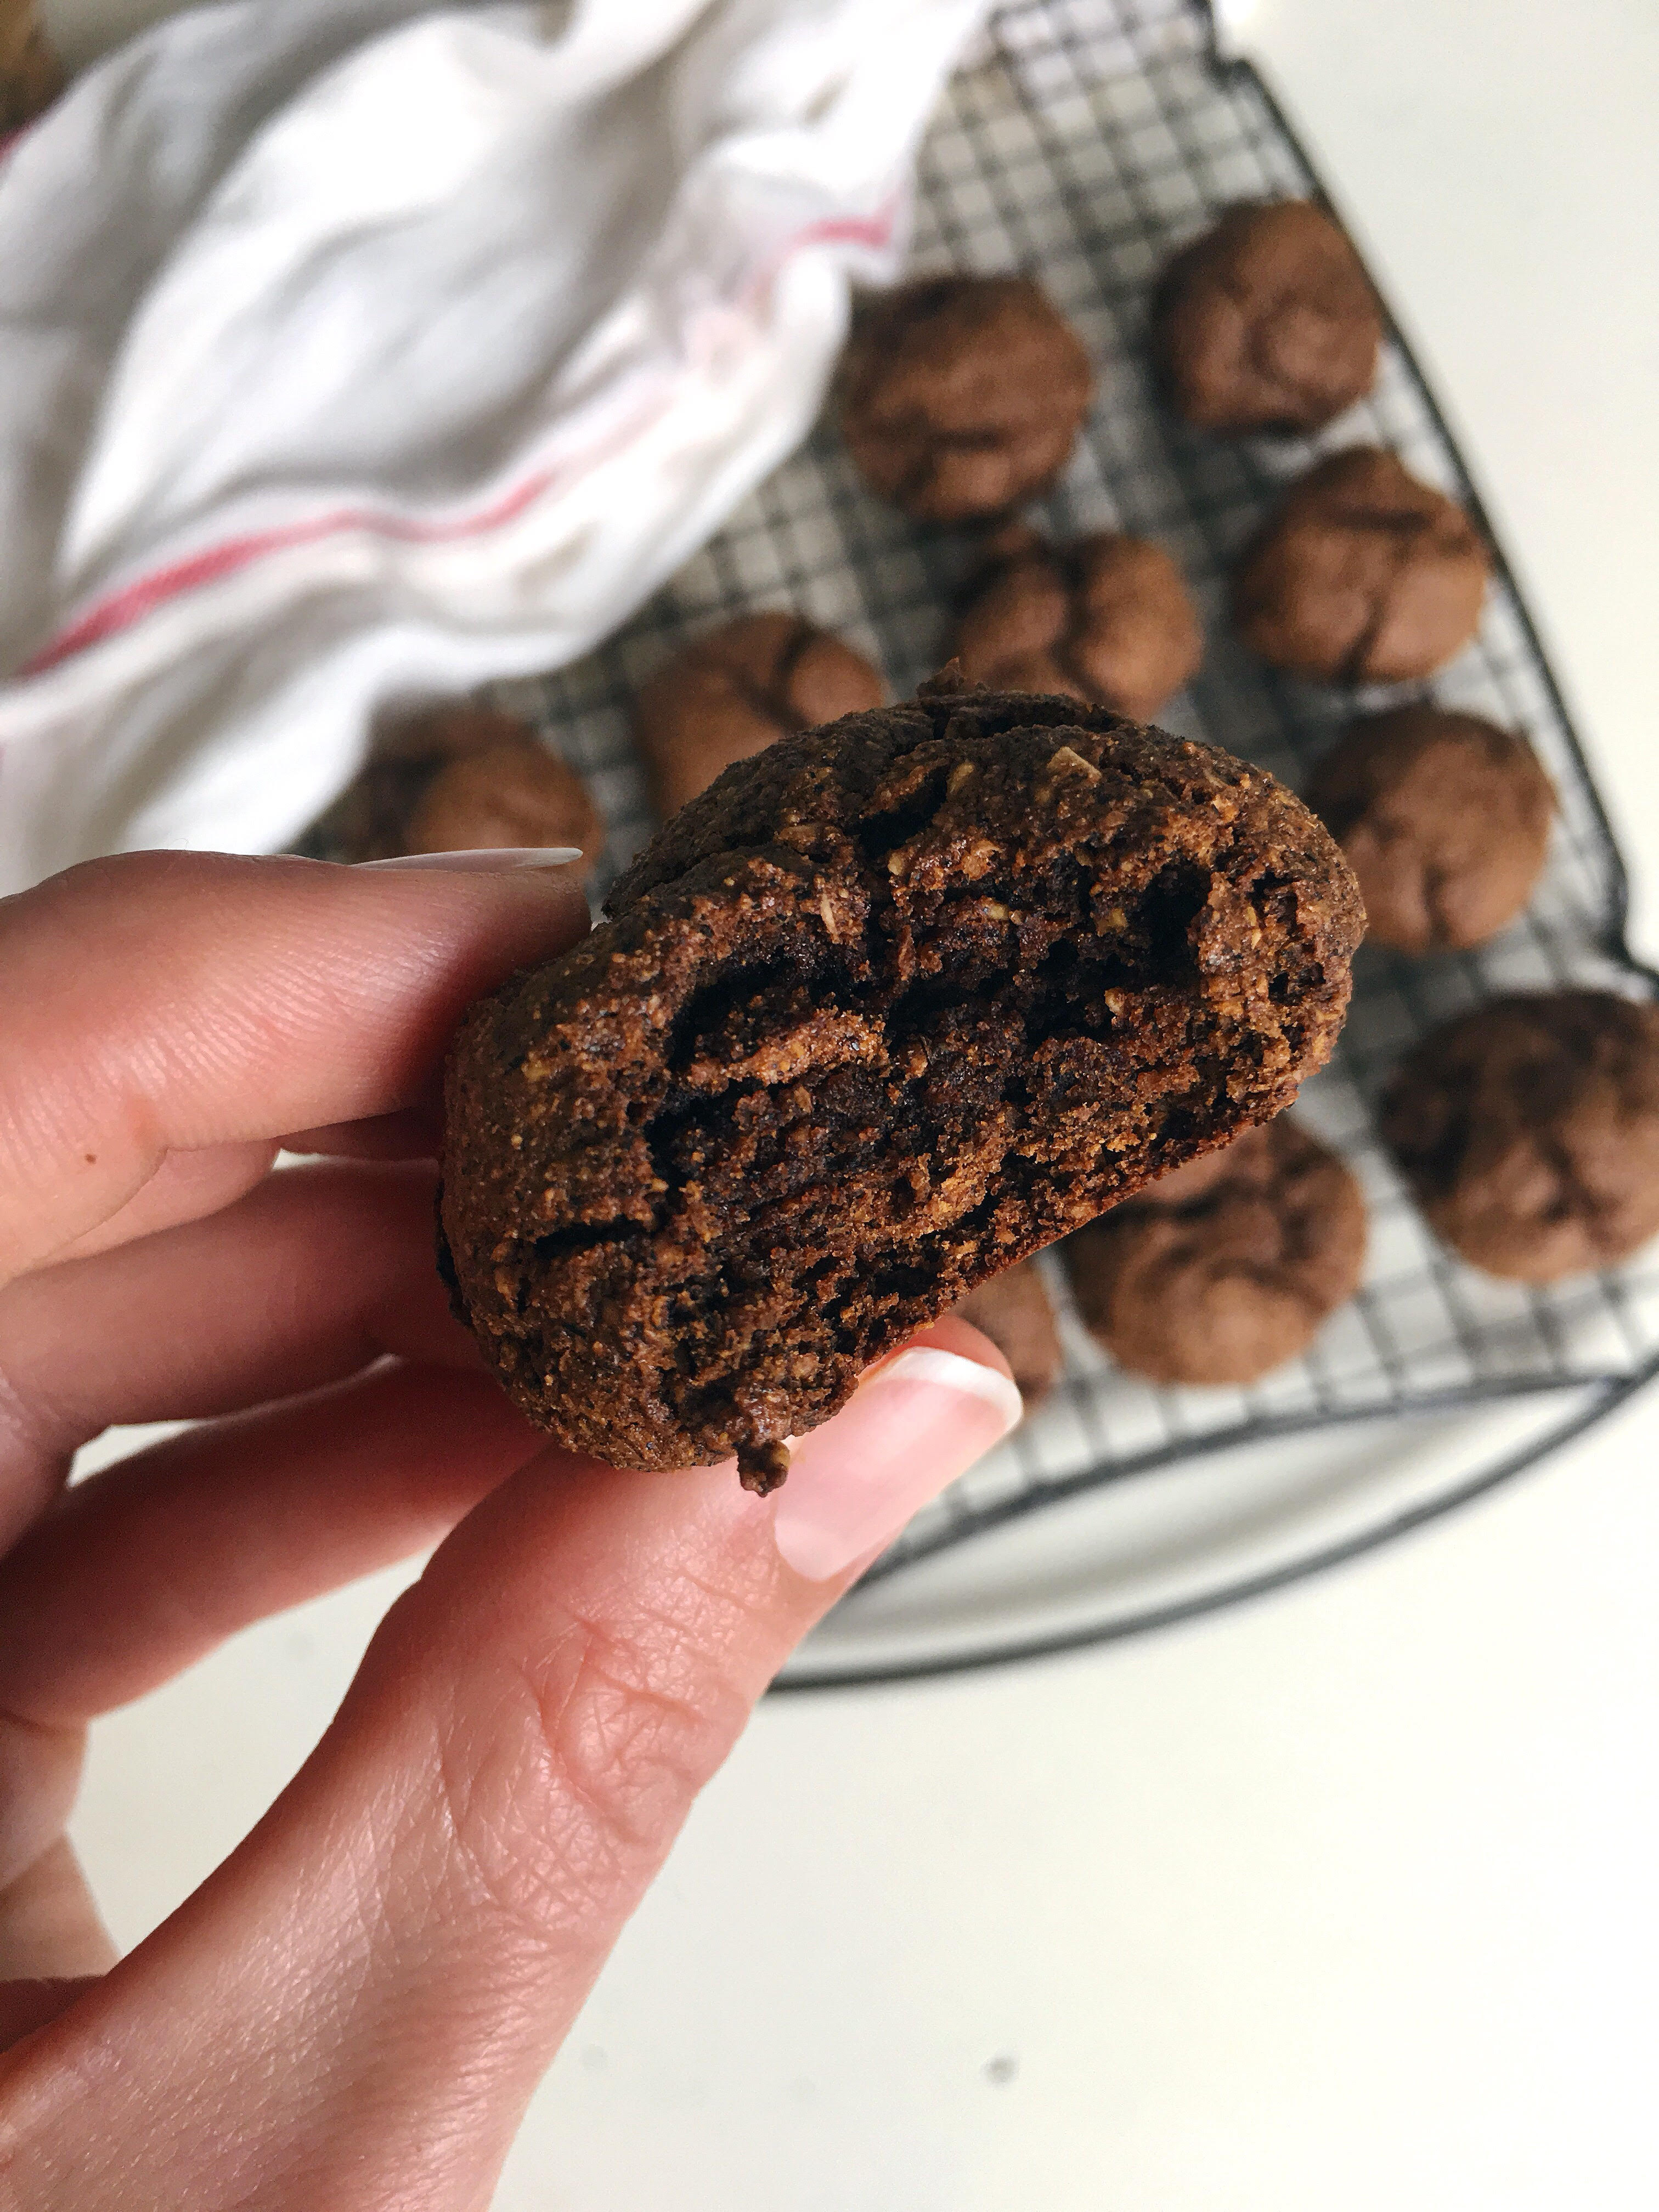
I loved the taste and texture Date Sugar brought to these ginger molasses cookies. Just the right amount of sweet & kept them so soft and chewy. These are gluten, dairy & egg free! A similar taste to my Christmas Gingerbread, but these are definitely not roll-able! They are a much softer, chewier cookie. If you’re looking to roll & cut shapes, check out my Christmas Gingerbread Cookies https://helpyourself.blog/2018/12/19/gingerbread-cookies/ Hope you enjoy!
wet ingredients:
1/4 cup coconut oil (melted & room temp)
1/4 cup apple sauce
1/3 cup molasses
1 tbs apple cider vinegar
dry ingredients:
1/3 cup ground flax seed
1 3/4 cup Buckwheat + 1 3/4 cup Oat Flour
1/2 cup date sugar
1 tsp baking soda
1/2 tsp baking powder
1 tsp ginger
1 tsp cinnamon
1/2 tsp nutmeg
dash of sea salt
Mix wet & dry ingredients separate bowls.
add the wet to dry & combine with a fork or (I recommend) using your hands. they will keep the coconut oil warm for easy mixing & rolling
scoop approx 1 tbs amount into hand & roll into ball.
place on pan & press down, slightly
bake for 8-10 min at 350 degrees.
remove from oven & allow them to cool.
store in an airtight container. They do freeze well!
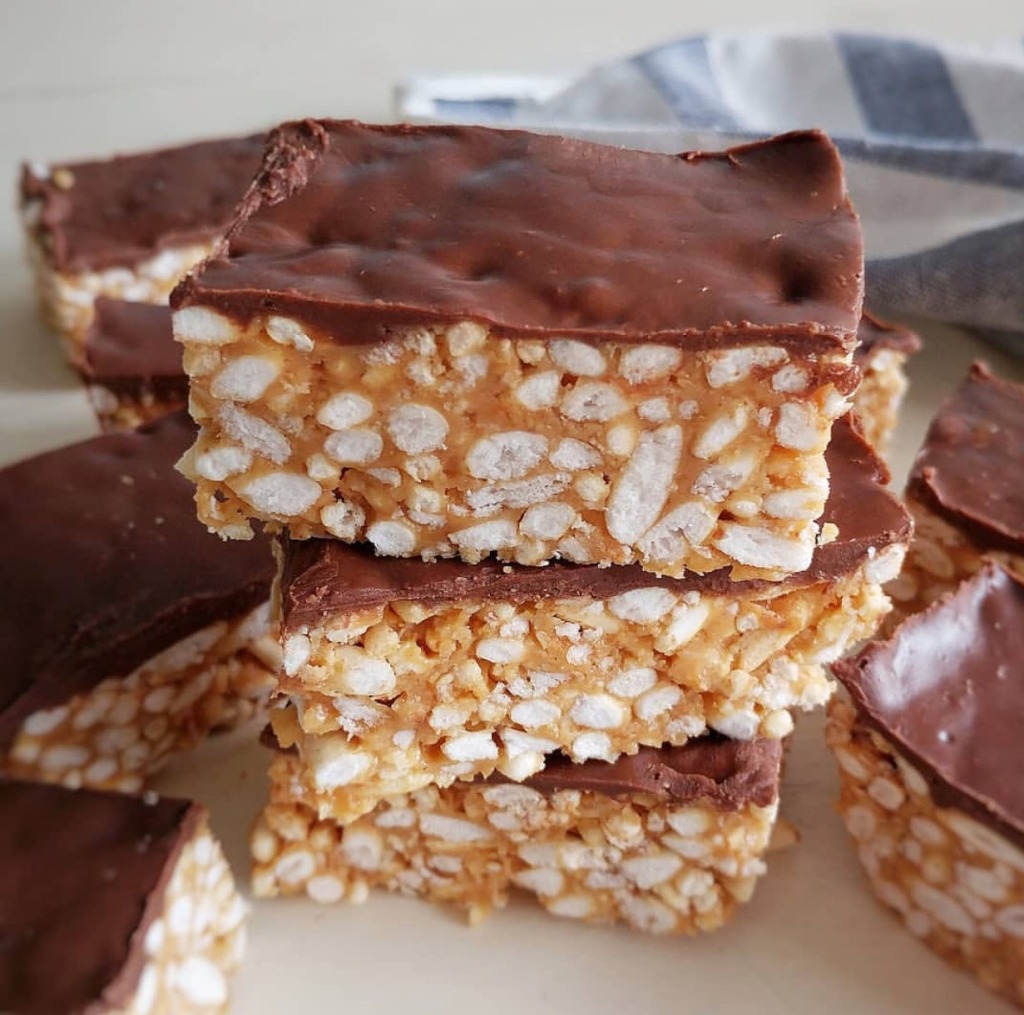
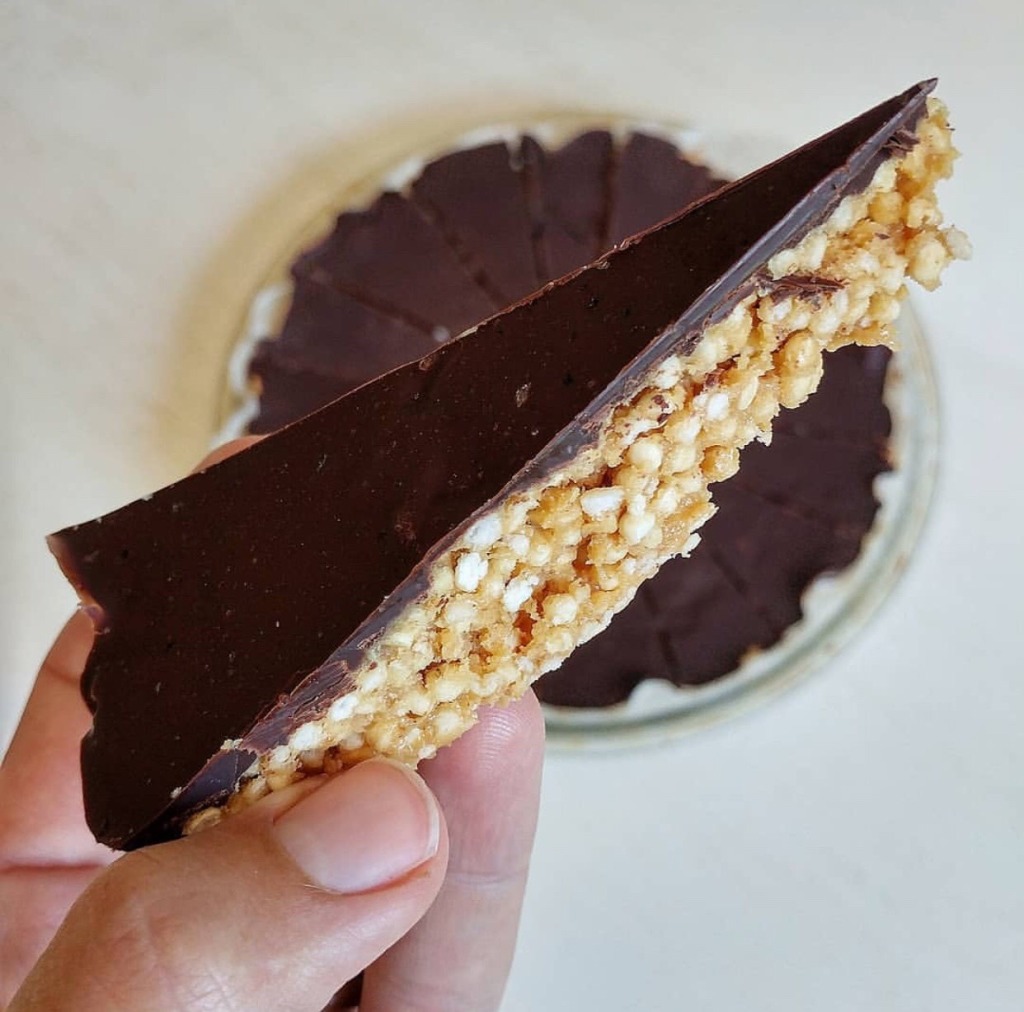
That peanut butter & chocolate combo never gets old! And something about these bars hits the spot every single time! Maybe its the cereal? – reminds me of all the Rice Krispie squares I grew up eating!
using GoGo Quinoa Puffed Quinoa
I have shared this recipe on Instagram a couple of times, it has probably been the most made recipe ever! So I figured it finally deserved a spot on the blog! Made with a handful of ingredients in only a few minutes with two cereal options, depending on your preference! If allergies are a concern, Sun Butter also makes a great nut free option in this recipe.
Peanut Butter Cereal Squares {with a nut free option}
for bottom layer – in sauce pan melt & mix:
2 tbs coconut oil
1/2 cup peanut butter*
1/2 cup maple syrup*
mix & add:
3 cup Natures Path Puffed Rice OR GoGo Quinoa Puffed Quinoa (my personal fave!)
-mix & press into a 9×13 pan
for chocolate layer -melt:
1/2 cup dark chocolate
1 tbs coconut oil in saucepan
-spread on top & refrigerate until hard – approx 1 hr.
* can sub for Almond Butter & Honey. Or Sun Butter for a nut free option!
We all want shiny, healthy hair with tons of volume! At times this can feel easier said than done. Sharing 8 tips from shower to styling – no frizz, tons of volume, with the health of you hair in mind. These can benefit you no matter what your hair type – Fine, thick, straight, or curly! If you follow me on Instagram, check out my new video on IGTV!
#1 minimal hair washing
Rule of thumb: the more you wash your hair, the more you have to. Your scalp and hair do need some oil, that’s what keeps it moisturizer and healthy. If you remove the oil too often, your body will try to compensate and will end up producing extra. Going through a detox time can be tough, but trying to go stretches without washing will result in less oil over time. If you normally wash everyday, try and stretch it two! Within a couple weeks you’ll be shocked at how less oily your hair is. NOTE: this is a very general idea. sometimes genetics, health, medications etc can play a role and so this may not be applicable.
#2 comb hair in shower
when your hair is wet it is more vulnerable to breakage, it’s in a weaker state. I comb my hair in the shower after I apply conditioner, before I rinse. This allows you to get the tangles out a lot easier and it’s gentler on your hair. After you have combed, rinse the conditioner – you won’t need to brush when you get out!
#3 cold rinse
The warm water will raise the outer layer of your hair, the cortex. Giving your hair a cold rinse will cause the cortex to lay flat, resulting in less frizz, softer and stronger hair!
#5 t-shirt – no towel!
Once you get out of the shower try wrapping your hair in a T-shirt, rather then a towel. It absorbs the water but the fabric will cause your hair to frizz less and won’t tug – especially important if you’re prone to breakage.
#6 air dry
Some mornings are just busy and we are in a rush to get done and out the door! But as often as possible, I try to allow my hair to air dry 75%+ Before taking the hairdryer to it. It takes less time to blow dry AND less heat is better for the health of your hair. Win win!!
#7 head upside down
When I blow dry my hair I always tip my head upside down and blow dry brushing with my fingers to start. Once it is 95%+ dry I use a large paddle brush and continue to brush my hair upside down. Your hair being brushed and dried in the opposite direction it naturally falls will create a ton of volume! This is why stylist, at the salon, pull your hair up as they blow dry and why they can get so much volume!
#8 ends only
Once you take your hot tools out (flat iron, curling iron, wand etc.) only use it from the middle to the ends of your hair. Your hair near scalp doesn’t often need the taming and using the heat can flatten all the beautiful volume from your blow dry.
Bonus:
teasing & hairspray:
for lasting volume, teasing and hairspray goes a long way! I teasing at root tons, hair spraying each layer as I go. Tame half way, give it 5-10 minutes to deflate naturally and then finish smoothing if necessary.
dry shampoo:
dry shampoo is a great quick morning trick. Also great if you are trying to detox and stretch your hair washing days. But most of all it gives lift and texture to the root of you hair – great for extra volume, super helpful if you have fine hair!! I make my own, you can find my homemade dry shampoo recipe a couple posts back!
deep side parts:
I love deep side parts. Creates tons of volume in fine, medium and thick hair! It also automatically gives you a bit of pizzazz & looks very put together with minimal effort – great on a morning when you are short on time!